The Goal
The Raspberry Pi 4 that ran my HyperHDR ambient-lighting setup
died. With current mini-PC and Pi prices, a used Dell Wyse 3040 thin client (Intel Atom
x5-Z8350, 2 GB RAM, 8 GB eMMC) was the cheaper and frankly nicer replacement: fanless,
x86_64, and plenty for HyperHDR’s ~250 MB working set. This note documents rebuilding the
host on it with DietPi - including the part that the official installer would not do for
me, and getting the 10-bit p010 capture format working on x86 via DKMS.
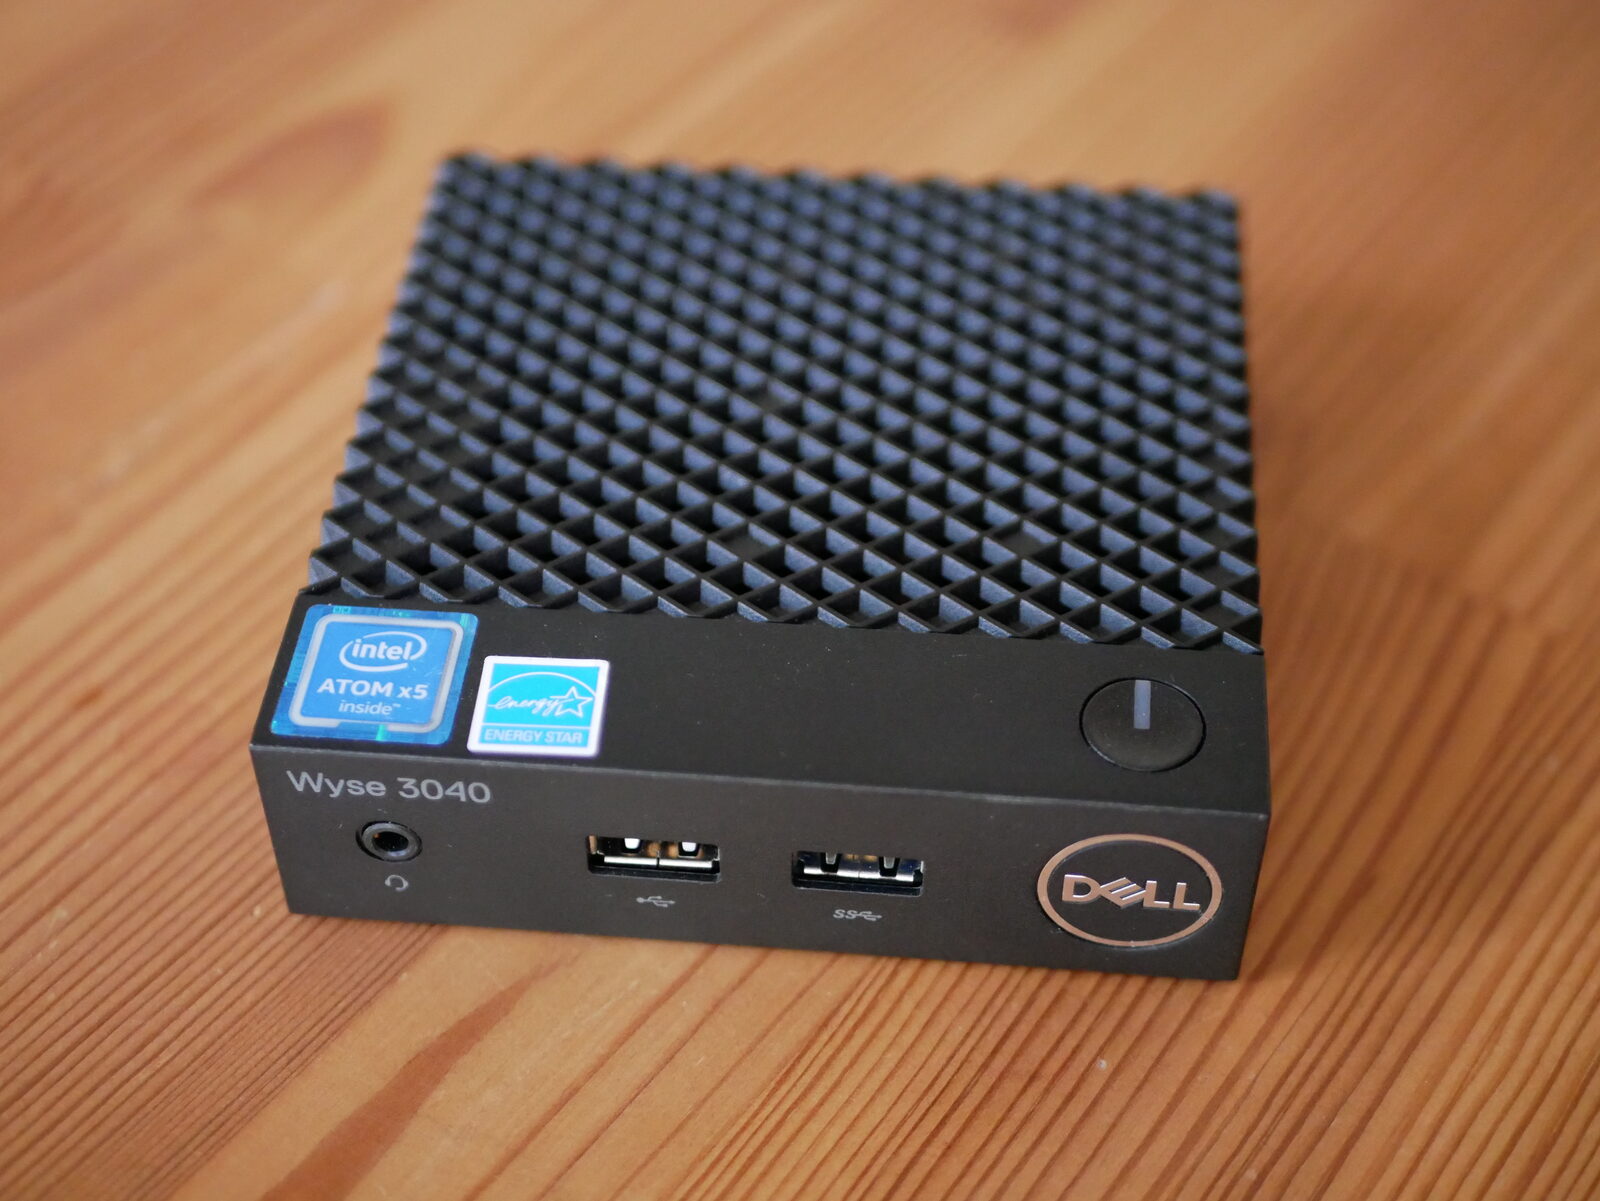 The Dell Wyse 3040 - fanless, palm-sized, and the box that replaced the Pi 4. Photo by Goovaeh8fot6yugh, CC0, via Wikimedia Commons.

Why dd-over-SSH instead of the installer ISO
DietPi does ship a NativePC-UEFI-x86_64 installer ISO, and that is the “proper” path.
On my Wyse it did not detect the internal eMMC as a target - could be specific to this unit
or my boot media, I did not dig in. The simpler route turned out to be the plain disk image
(.img.xz): a
DietPi image written byte-for-byte onto a disk is a bootable DietPi - whatever storage
you write it to becomes the system. (That was the bit I tripped over at first: I flashed
the image to a USB stick before realising the image modifies exactly the target you point
it at, so the target should be the eMMC, not a stick.)
So the plan: boot a throwaway live OS on the Wyse, and from my workstation stream the DietPi image straight onto the Wyse’s eMMC over SSH.
Steps
1. Enable USB boot in the Wyse BIOS
Press F2 at power-on, enter the default BIOS password Fireport, then System
Configuration → USB Configuration and turn USB boot on. Details for this specific box
are in Dell’s KB article;
I won’t repeat them here.
2. Boot a live OS with SSH
Boot any live system that gives you SSH and dd - I used an Arch ISO out of habit, but
anything works. On the live console, set a root password so you can log in over the
network:
passwd
3. Download the DietPi image
On your workstation, grab the NativePC-UEFI-x86_64 disk image (the .img.xz, not the
installer ISO) from the DietPi images index. No
need to unpack it - the next step decompresses it on the fly, so the 1+ GB image never
lands on disk.
4. Flash the image onto the eMMC over SSH
Decompress the image and stream it from your workstation into dd running on the Wyse,
writing to the internal eMMC (/dev/mmcblk0):
xzcat DietPi_NativePC-UEFI-x86_64-Trixie.img.xz | pv | \
  ssh root@10.10.10.223 dd of=/dev/mmcblk0 bs=4M conv=fsync iflag=fullblock
xzcat unpacks the .img.xz straight into the pipe; pv gives a progress bar; bs=4M
copies in 4 MiB blocks (far fewer, larger writes than the default 512 B); conv=fsync and
iflag=fullblock make the write reliable. (I use an insecssh alias - plain ssh with
host-key checking disabled - because the live system is ephemeral and its host key changes
every boot.)
5. Edit dietpi.txt before the first boot
DietPi applies dietpi.txt once, on the first boot. Edit it now, while the eMMC is still
mounted on the live system, so the first boot comes up already configured. Mount the
DietPi root partition and edit the file:
mount /dev/mmcblk0p3 /mnt
# edit /mnt/dietpi.txt
Rather than dump the whole file, here are the meaningful deviations from the stock
dietpi.txt, grouped by intent.
Unattended, headless first boot - this is what lets the box come up over the network with no monitor:
AUTO_SETUP_AUTOMATED=1
AUTO_SETUP_GLOBAL_PASSWORD=...
AUTO_SETUP_SSH_PUBKEY=ssh-rsa AAAA...
SOFTWARE_DISABLE_SSH_PASSWORD_LOGINS=1
AUTO_SETUP_NET_HOSTNAME=hyperhdr
The build toolchain for the P010 DKMS module, plus a few diagnostics, installed while the system is still online and writable:
AUTO_SETUP_APT_INSTALLS=mmc-utils v4l-utils usbutils dkms build-essential linux-headers-amd64
dkms build-essential linux-headers-amd64 are what step 8’s dkms-installer.sh needs to
compile the p010 kernel module; v4l-utils (v4l2-ctl) and usbutils (lsusb) help
diagnose the grabber; mmc-utils reports eMMC health.
eMMC-friendly choices - 2 GB of RAM against a ~250 MB workload means swap is pure write wear for no benefit:
AUTO_SETUP_SWAPFILE_SIZE=0
Regional and misc cleanups:
AUTO_SETUP_LOCALE=en_US.UTF-8
AUTO_SETUP_KEYBOARD_LAYOUT=us
AUTO_SETUP_TIMEZONE=Europe/Kyiv
CONFIG_SERIAL_CONSOLE_ENABLE=0       # SSH-managed; does NOT touch the RP2040's /dev/ttyACM*
CONFIG_ENABLE_IPV6=0
SURVEY_OPTED_IN=0
CONFIG_GPU_DRIVER=none               # x86 Intel; HyperHDR's USB grabber needs no GPU driver
I left AUTO_SETUP_NET_USESTATIC=0 and instead pinned the DHCP lease to a fixed address on
the router, so the web UI stays reachable at a stable address without hard-coding it here.
6. Boot DietPi from the eMMC
Flush, unmount, reboot, and pull the USB stick so the Wyse boots from the eMMC:
sync && umount /mnt && reboot
7. Let the unattended install finish
With AUTO_SETUP_AUTOMATED=1 the first boot runs the whole DietPi setup without prompts.
It reboots itself a couple of times along the way; let it settle.
8. Install HyperHDR, the P010 module, and ezcoo-usb-control
HyperHDR (by awawa-dev) is not in the DietPi
catalogue, so install its .deb by hand. On x86 there is no pre-patched image, so the
p010 V4L2 support is built as a DKMS module from awawa-dev’s
P010_for_V4L2 instead (the build toolchain
came in via AUTO_SETUP_APT_INSTALLS in step 5). The third package,
ezcoo-usb-control, is my own
small service that bridges the EZCOO HDMI matrix’s USB-serial control protocol to Home
Assistant over MQTT - it is what lets HA switch matrix inputs and read state.
cd /tmp
wget https://github.com/awawa-dev/HyperHDR/releases/download/v22.0.0.0beta2/HyperHDR-22.0.0.trixie.beta2-x86_64.deb
dpkg -i HyperHDR-22.0.0.trixie.beta2-x86_64.deb || apt -f install -y   # pull missing deps

wget https://raw.githubusercontent.com/awawa-dev/P010_for_V4L2/refs/heads/master/dkms-installer.sh
chmod +x ./dkms-installer.sh
./dkms-installer.sh 2          # 2 = Debian/Ubuntu (DietPi counts here too)

wget https://gitea.berezovskyi.dev/oleksandr/ezcoo-usb-control/releases/download/v1.0.0/ezcoo-usb-control_1.0.0_amd64.deb
dpkg -i ezcoo-usb-control_1.0.0_amd64.deb || apt -f install -y
Letting dpkg -i fail and following with apt -f install is more robust than naming
dependencies (like libglib2.0-0t64) by hand - the names drift between releases, apt
just resolves whatever the .deb actually needs.
9. Point ezcoo-usb-control at the right serial port and MQTT broker
# /etc/ezcoo-usb-control/config.yaml
device:
  port: /dev/ttyUSB0
  baud: 57600
  poll_interval: 5s

mqtt:
  broker: tcp://homeassistant.iot.lviv:1883
  username: "ezcoo-usb-control"
  password: "<your-mqtt-password>"   # set to your broker password
  client_id: ezcoo-usb-control
  base_topic: ezcoo
  discovery_prefix: homeassistant
systemctl restart ezcoo-usb-control
The matrix then shows up in Home Assistant through MQTT discovery.
HyperHDR’s own application config - LED layout, the P010 LUT, smoothing, the automations' expectations - I restored from a backup of the old host, so it all came over verbatim rather than being re-entered by hand. The rest of the rig (capture card, LED controller, wiring) is physically unchanged from the main setup note.
What Works
The same job runs on the Wyse as on the old Pi 4 - no problems for me, though this is a
fresh ARM→x86 move on beta software, so your mileage may vary. The key thing to verify is
that the DKMS module actually makes p010 visible to V4L2 on a stock x86 kernel:
# dkms status v4l2-p010
v4l2-p010/1.0, 6.12.90+deb13.1-amd64, x86_64: installed (Original modules exist)

# v4l2-ctl --list-formats-ext -d /dev/video0 | grep -i -A3 p010
        [5]: 'P010' (10-bit Y/UV 4:2:0)
                Size: Discrete 1920x1080
                        Interval: Discrete 0.017s (60.000 fps)
                        Interval: Discrete 0.033s (30.000 fps)
In normal operation (TV on, capturing) HyperHDR keeps one core busy - a single hyperhdr
process around 70% of a core, ~115 MB RES, ~230 MB of system memory used out of 2 GB - with
the Atom’s cores at 48-51 °C, fanless. When the TV is off the LED instance is disabled, so
there is nothing to process and the host drops back to essentially idle.
ezcoo-usb-control reconnects to the matrix on /dev/ttyUSB0 and re-announces over MQTT,
so Home Assistant picks it up without changes.
Caveats / Open Items
The p010 support is an out-of-tree DKMS module, and that is the most likely future
breakage. DKMS rebuilds it automatically on a kernel upgrade only while the matching
linux-headers-amd64 package stays installed. If the headers ever get removed, the next
kernel update silently boots without the module and capture loses P010 - so it is worth
keeping the headers pinned and glancing at dkms status after kernel upgrades.
Disk is the other thing to watch: Trixie plus the DKMS toolchain (build-essential and
kernel headers) is a tight fit on the 8 GB eMMC, so keep an eye on df -h.
Finally, the install is still a manual sequence after first boot. DietPi’s
AUTO_SETUP_CUSTOM_SCRIPT_EXEC could fold steps 8-9 into a script that runs at the end of
the first boot, making the box reproducible from dietpi.txt alone.
I haven’t bothered yet - it’s a one-off rebuild - but it’s the obvious next step if this host ever dies too.